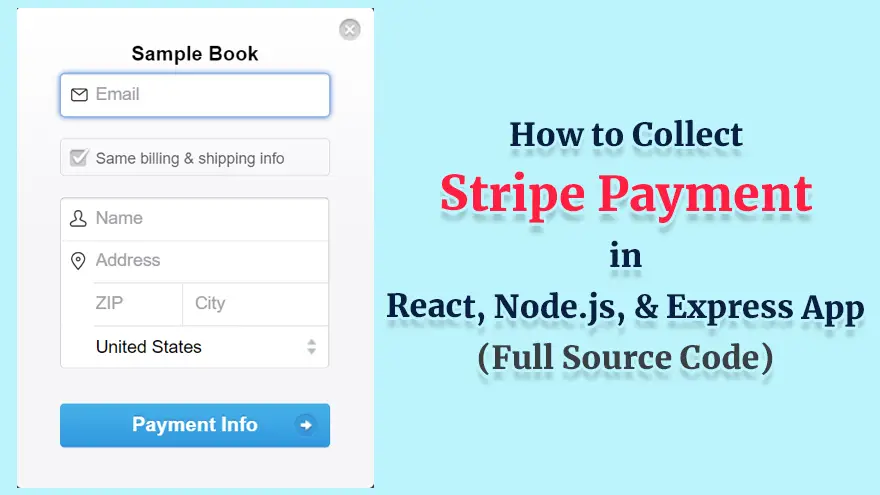
In this tutorial, you will learn how to integrate the Stripe payment gateway with React, Node.js, Express app. We will use the react-stripe-checkout library to collect the payment from our users.
Here are some screenshots of the React Stripe Checkout app that you will be creating today.
Let’s get started by creating a new folder “client” to hold our React app.
mkdir client
cd client
Now create the sample React app in this folder.
npx create-react-app sampletestapp
At this point, we need to install some libraries that will help us build the React Stripe checkout functionality.
npm i axios
npm i react-stripe-checkout
npm i react-toastify
Now open the App.js file and copy/paste the following code into it.
Important Note: On line # 55, replace ##your_publishable_key## with the real publishable key that you got from your Stripe account dashboard.
import "./App.css";

import { useState } from "react";

import StripeCheckout from "react-stripe-checkout";

import axios from "axios";

import { toast } from "react-toastify";

import "react-toastify/dist/ReactToastify.css";

function App() {

  toast.configure()

  const [product] = useState({
    name: "Sample Book",
    price: 120,
    description: "This is a sample book",
  });

  async function handleToken(token, addresses) {
    const response = await axios.post(
      "http://localhost:8080/checkout",
      { token, product }
    );

    console.log(response.status)

    if (response.status === 200) {
      toast("Success! Check email for details", { type: "success" });
    } else {
      toast("Something went wrong", { type: "error" });
    }
  }

  return (
    <div className="App">
      <div className="container">
        <br />
        <br />
        <h1 className="text-center">Stripe Checkout</h1>
        <br />
        <h2 className="text-center">Product Info</h2>
        <h3 className="text-center">Product Name: {product.name}</h3>
        <h3 className="text-center">Product Price: {product.price}</h3>
        <h3 className="text-center">
          Product Description: {product.description}
        </h3>
        <br />
        <div className="form-group container">
          <StripeCheckout
            className="center"
            stripeKey="##your_publishable_key##"
            token={handleToken}
            amount={product.price * 100}
            name="Sample Book"
            billingAddress
            shippingAddress
          />
        </div>
      </div>
    </div>
  );
}

export default App;
Now we will make a backend for our React Stripe integration app. So, let’s create a new directory and name it “server” as shown below.
mkdir server
cd server
Now initialize the Node.js in it.
npm init -y
npm i express
npm i cors
npm i uuid
npm i stripe
Important Note: On line # 4, replace ##stripe_secret_key## with the actual Stripe secret key that you got from your Stripe account dashboard.
const cors = require("cors");
const express = require("express");
const bodyparser = require('body-parser')
const stripe = require("stripe")("##stripe_secret_key##");
const uuid = require("uuid").v4;

const app = express();

app.use(bodyparser.urlencoded({ extended: false }))
app.use(bodyparser.json())
app.use(cors())

app.get("/", (req, res) => {
  res.send("Add your Stripe Secret Key to the .require('stripe') statement!");
});

app.post("/checkout", async (req, res) => {
  console.log("Request:", req.body);

  let error;
  let status;
  try {
    const { product, token } = req.body;

    const customer = await stripe.customers.create({
      email: token.email,
      source: token.id,
    });

    const idempotency_key = uuid();
    const charge = await stripe.charges.create(
      {
        amount: product.price * 100,
        currency: "usd",
        customer: customer.id,
        receipt_email: token.email,
        description: `Purchased the ${product.name}`,
        shipping: {
          name: token.card.name,
          address: {
            line1: token.card.address_line1,
            line2: token.card.address_line2,
            city: token.card.address_city,
            country: token.card.address_country,
            postal_code: token.card.address_zip,
          },
        },
      },
      {
        idempotency_key,
      }
    );
    console.log("Charge:", { charge });
    status = "success";
  } catch (error) {
    console.error("Error:", error);
    status = "failure";
  }

  res.json({ error, status });
});

app.listen(8080);We evaluated the performance of Llama 3.1 vs GPT-4 models on over 150 benchmark datasets…
The manufacturing industry is undergoing a significant transformation with the advent of Industrial IoT Solutions.…
If you're reading this, you must have heard the buzz about ChatGPT and its incredible…
How to Use ChatGPT in Cybersecurity If you're a cybersecurity geek, you've probably heard about…
Introduction In the dynamic world of cryptocurrencies, staying informed about the latest market trends is…
The Events Calendar Widgets for Elementor has become easiest solution for managing events on WordPress…