In this tutorial, you will learn how to schedule a Python 3 script using Windows Task Scheduler. Basically, this project will be very useful when you want to execute your Python code at specific times.
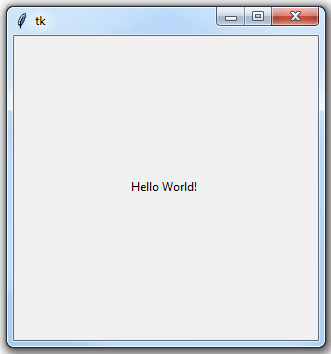
For the sake of this tutorial, I’ll create a Python program that prints “Hello World!” on screen and make it execute every day at 6 am.
Hello_World.py
import tkinter as tk

root= tk.Tk()

canvas1 = tk.Canvas(root, width = 300, height = 300)
canvas1.pack()

label1 = tk.Label(root, text='Hello World!')
canvas1.create_window(150, 150, window=label1)

root.mainloop()
Create Batch File to Execute the Python Script
Open Notepad, and create a new file. Then save this Notepad file with the “bat” extension. In my case, I’ll save it as Run_Python_Script.bat
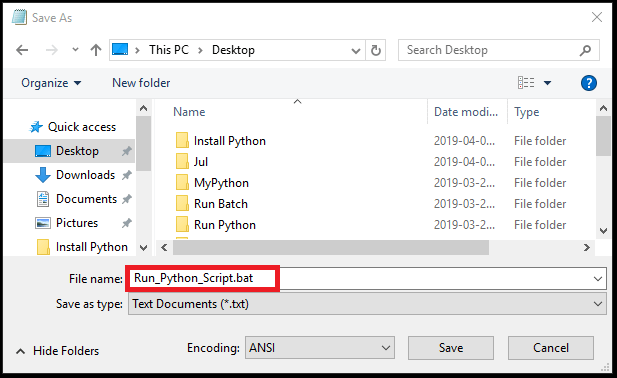
Now provide the path of your Python .exe and Hello_World.py file inside this new .bat file. In my case, the paths will be:
- The path where my Python .exe is stored: “C:\Users\Ron\AppData\Local\Programs\Python\Python37-32\python.exe”
- The path where my Hello_World.py script is stored: “C:\Users\Ron\Desktop\Hello_World.py”
You have to adjust these paths according to where you installed Python on your computer as well as where you stored the Hello_World.py file.
After that, add the pause command on the next line. Like this:
“C:\Users\Ron\AppData\Local\Programs\Python\Python37-32\python.exe” “C:\Users\Ron\Desktop\Hello_World.py”
pause

This batch file will execute our Python script whenever you double-click on it.
Schedule the Python Script using Windows Task Scheduler
Now it’s time to schedule that batch file to run our Python Script using the Windows Task Scheduler.
As I’m on Windows 10, so I’ll use it to run the Python Script via the Windows Task Scheduler. You don’t have to change anything if you’re on a previous version of Windows. The below-mentioned steps will work on all modern versions of Windows such as Windows 7, 8, 10, and 11.
Step 1:-
Open the Control Panel and then click on the Administrative Tools.

Step 2:-
Now, double-click on the Task Scheduler and then select the ‘Create Basic Task…’ option.

Step 3:-
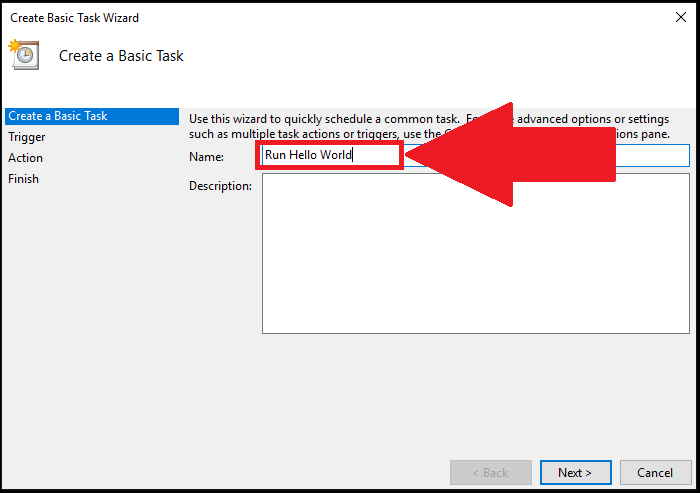
Enter a name for your task. Optionally, you can also provide a description if you like. After that, press “Next”.
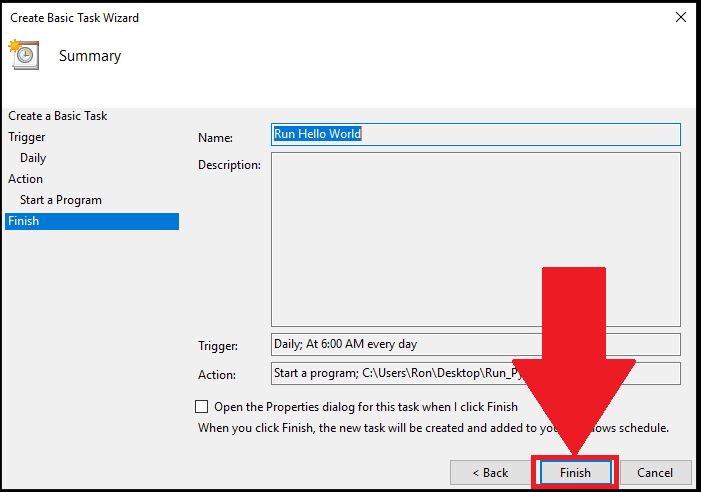
In my case, I named the task as “Run Hello World”.
Step 4:-
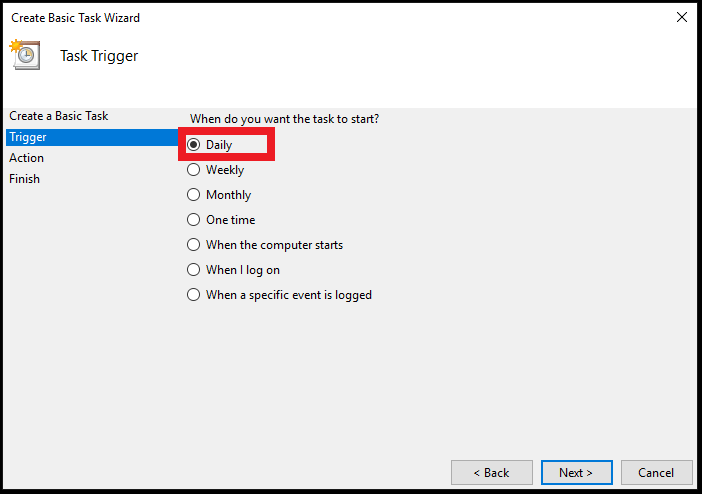
In the “Task Trigger” section, select “Daily” because we want our Python script to execute daily at 6 am. After that, press “Next”.
Step 5:-
The action will then recur every 1 day at 6 am, starting from 2019-04-01. Kindly adjust those timing details according to your needs.

Step 6:-
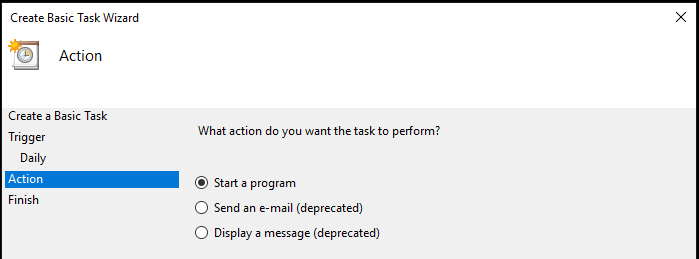
Inside the “Action” section, select “Start a program” and then press Next.
Step 7:-
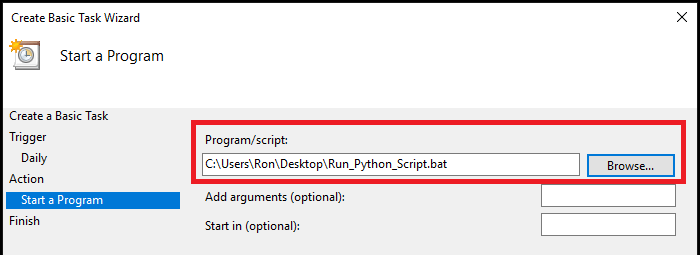
Now, use the “Browse” button to search and then select the batch file that runs the Python script. In my case, I placed the Run_Python_Script.bat file on my Desktop.
Step 8:-
Finally, it’s time to click “Finish”, and you will be good to go.
Now, you’ll see the “Hello World!” message every day exactly at 6 am.

